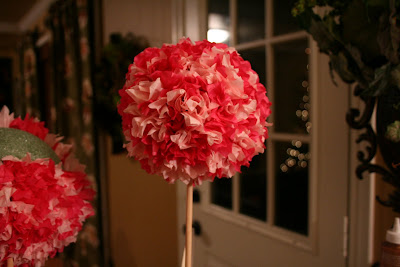
 I've already started working on decor for Audrey's first birthday party. It is a good thing I started early because the decor is taking me much longer to find and put together then I thought. As part of the decor I am making tissue paper topiaries as center pieces for one of the tables. I am using a method that we learned in elementary art class. I am not completely finished with them but I will definitely post a picture of the final product soon!
 Tissue Paper Topiaries
- Tissue Paper Cut into 2X2 squares
- Tacky Glue
- Pencil or Pen
- Styrofoam Ball
- Wooden Craft Sticks
- Flower Pot
- Floral Foam
- Reindeer Moss
- Spray Paint
1) Cut tissue paper into 2X2 squares. I used light pink and dark pink for my topiary to coordinate with the party.
2) Stick the wooden stick into the styrofoam ball (This makes it much easier to hold while gluing)
3) Wrap the piece of tissue around the end of a pencil or pen
4) Dip into craft glue and press firmly onto the styrofoam ball. I make sure that the ball crinkles when I am gluing the tissue to it, this ensures that it will stay well.
Here is the ball I am currently working on.
5) When your balls are complete, remove the stick and spray paint the stick and flower pot. (I will be spray painting mine a metallic silver.)
6) When both pots and sticks are dry push stick back into ball, then punch through floral foam to ensure stablility in the pot (I have not gotten to this step, but here is what the floral foam looks like, it will fit flesh with the top of the pot)

7) Once this is complete I will then cover floral foam in reindeer moss

Then your topiary is complete!
If you want to add a little extra Sandra suggested small birds or even putting push pins topped with pearls throughout. I am anxious to finish and will definitely post the final product.
I hope this helps with your future party planning!!!


No comments:
Post a Comment